When it comes to refreshing your home, nothing delivers a bigger bang for your buck than paint: You can add significant value and improve your home’s energy efficiency (yep, you can!) by doing it yourself. And, of course, the DIY approach will save you money—about $2,000 on an exterior job and as much as $500 per room, according to the website HomeAdvisor.
Many people shy away from painting their own homes because they think it’s too difficult. But with the right tools, it’s totally possible to DIY it. “The biggest factors are comfort and equipment,” says Dan Schaeffer, owner of Five Star Painting of Austin in Texas. “It’s relatively easy to paint walls, but painting cabinets, for example, typically requires specialized spray equipment, which most homeowners don’t have.” So consider the scope of your project, and follow the tips on color and technique below for a successful paint job:
Pick The Perfect Hue


When it comes to your home’s overall value and energy consumption, some colors are actually better than others. For interiors, Schaeffer recommends crowd-pleasing neutrals, which make rooms appear airy. “For interiors we are seeing grays, light greens, blues, and whites are all popular now,” he says. And according to a 2016 Zillow Digs study, these hues really do pay off: For-sale listings with warm neutrals can sell for as much as $1,300 more than asking. (Even just painting your kitchen—in a light, creamy yellow, for instance—can fetch up to $1,360 more.)
For exteriors, Schaeffer says darker colors will absorb more heat, which can increase
air-conditioning bills. Darker colors also fade faster, requiring more maintenance and costing more in the long run. So from an efficiency and curb appeal point of view, Schaeffer recommends colors consistent with the architecture and building materials used on the house. On most newer homes, those colors are grays and beiges, which are classic and work harmoniously with a variety of other accent building materials like stone, wood and brick.
Shine On
According to Schaeffer, sheen adds durability to interior walls because it’s easier to clean, making it a cost-effective solution for high-traffic areas. “Focus on putting sheen in places people touch a lot,” says Schaeffer. Eggshell, which imparts a subtle shine, is great for bathrooms and living rooms. Schaeffer recommends upping the sheen factor by using semigloss for cabinets, trims and doors because they get damaged easily, and using matte paint on ceilings.
Sheen’s hardiness also makes it a good choice for exteriors. “Satin finish is most commonly used for its durability,” says Schaeffer. But if your exterior is masonry or stucco, a lower sheen is better at hiding imperfections.
Prep Properly And Use The Right Tools
“The first step in any painting project is to free the walls of any dirt or dust,” says Schaeffer. Wipe down walls with a damp rag. If you’re painting a kitchen or bathroom, check walls for soap scum and grease, which might require a degreaser for removal.
Make sure there are no nail holes or cracks in your surfaces. If need be, patch walls, then smooth them down with sandpaper. Schaeffer recommends using drop cloths to cover floors (and furniture, if you can’t move them), then, depending on the project’s scope, applying painter’s tape to baseboards, trim and moldings for protection.
You’ll need a brush, extension pole, roller and liner for the roller pan. You’ll also likely need a ladder to reach the top of walls and ceilings (always have someone hold it secure while you’re on it). If working with chemicals to thin or strip paint, wear gloves, closed-toe shoes and a face mask or respirator. Remember to ventilate the room by opening windows for as long as possible—at least during the painting and as the walls dry.
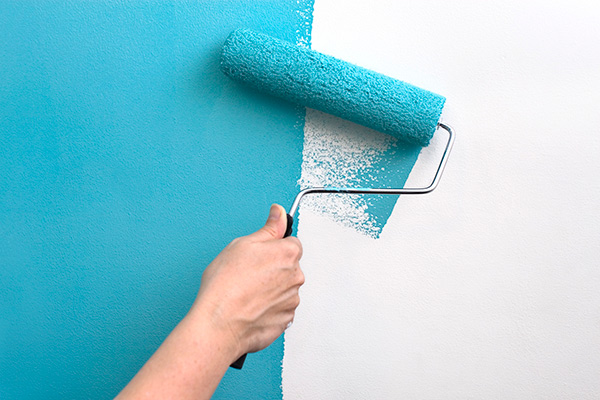
Schaeffer says to start jobs from the top of a room and work your way down: Ceilings (if you’re painting them), walls, baseboards then doors. Paint along the edge of the ceiling in a line (from side to side) with a brush, a technique called “cutting in,” then do the same along windows, doors and molding on that wall. Then get rolling. You’ll want to keep a “wet edge,” which means rolling on top of wet paint to keep color consistent (in other words, don’t let the previous edge dry before painting your next stroke over it), says Schaeffer. Generally, two coats of paint are needed for any color change. Follow manufacturer’s directions for dry-time recommendations in between coats.
For exteriors, Schaeffer says to begin with the body and siding, then finish with the trim. Let the pros handle painting anything over one story, since it tends to be labor-intensive and will require the use of tall ladders.
Want even more advice on increasing the value of your home? Try these 5 ways to increase your home’s curb appeal.
By Danielle Blundell
