
Being a master crafter might seem like something that would take you years to accomplish. But believe it or not, there are many crafts you can learn in a fraction of that time! Check out these ideas to get you started:
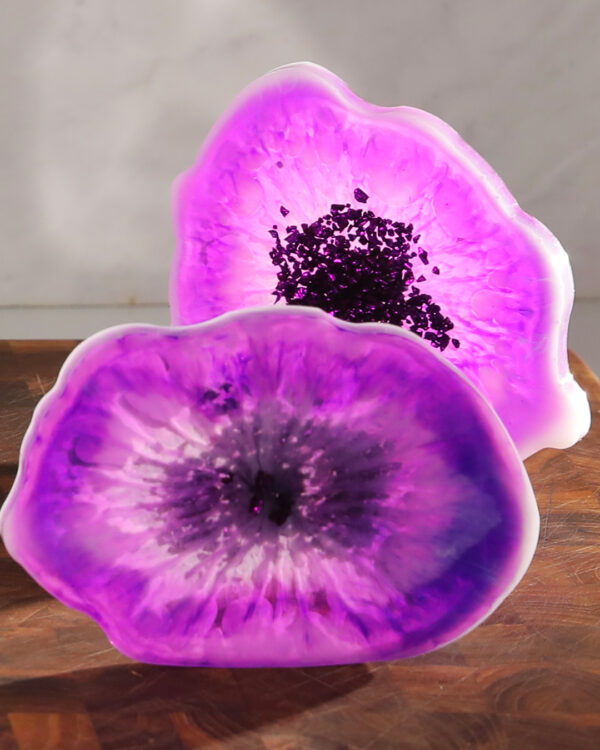
Resin Geode Coasters
 Supplies
16 oz Resin
Hardener
Silicone geode coaster mold
Purple alcohol ink
Blue alcohol ink
Black alcohol ink
White alcohol ink
Glass chips
Resin mixing cups
Resin stirring stick
*Optional depending on resin safety instructions: Safety goggles
*Optional depending on resin safety instructions: Gloves
Instructions
1. Measure and mix resin (around 16 ounces).
2. Mix resin and hardener together until resin is clear and no longer cloudy.
3. Split the resin so you have about 3–4 ounces of mixed resin for each color, also leaving some clear. Add 5 drops of purple and blue to one cup, 5 drops of purple and black to another cup, and 5 drops of white to another cup, and mix well.
4. Pour white resin around perimeter of the mold. Pour slowly to avoid bubbles.
5. Then, pour colored resin next to the white resin. Pour as many rings of colored resin as you want, being sure to work quickly. The resin will blend together at the edges.
6. Finish the coaster by adding clear resin and glass chips to the center.
7. Allow resin to cure for 12 hours. Remove from mold.
8. Enjoy!
WAX SEALS
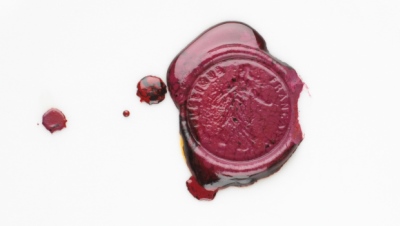 Here’s an easy way to step up your snail mail game: craft your own wax seal. Draw your design onto a wooden dowel, then carve into the dowel with a wood-burning tool. Next, seal the design with wood stain. Once it’s dry, melt some wax and drip it onto an envelope. Carefully push your seal into the wax for the desired effect.
BOOK BINDING
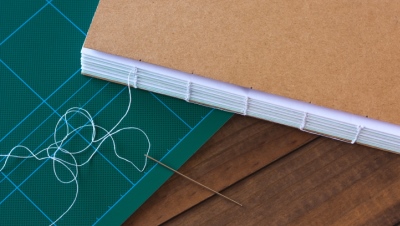 Sure, you can scribble in a store-bought notebook, but there’s something extra-special about writing in a book you made. Begin by folding four groups of six to eight pieces of paper together, poking 3-4 holes—about an inch apart—down the fold of each collection. Use these poked holes to sew the pieces together. Next, sew each collection together, keeping them in place with a binder clip. Create your own cover by wrapping cardboard in fabric or giftwrap, then glue the pages in. Now it’s time to start working on the next Great American Novel.
UP-CYCLING BOTTLES
 Leftover glass bottles are more versatile than you think. Cut off the tops and sand the edges of old soda bottles to make drinking glasses, or use halved bottles as candle holders or planters. If you’d rather not cut glass, try filling an empty glass bottle with battery-operated string lights. Voilà: a DIY lamp!
MOSAICS
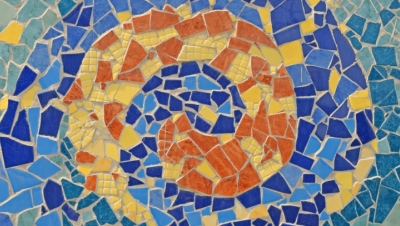 Mosaics are an easy way to add some color to a terra cotta planter or serving tray. To get started, you’ll first want to draw on a design. Next, gather some old dinner plates and wrap them in a towel. Using a hammer, (carefully) hit the towel-covered plates in order to break them into shards (make sure you wear protective eyewear). Treat the resulting pieces like tile: glue them on by following the design you outlined, then cover the entire surface in sandless grout. Wipe away the excess, let dry, and then be sure to put your new piece front-and-center the next time you have guests over.
DIP-DYEING
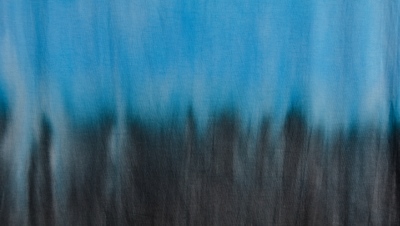 Ombre designs may look tricky, but they’re actually surprisingly easy to pull off at home. Put on some rubber gloves and prepare fabric dye in a bucket or glass bowl according to the box’s instructions. Start by dipping the bottom third of a white t-shirt (or canvas sneakers, or tote bag) into the liquid for 10 minutes. Dip the next section for just 5 minutes, and the top section just long enough to achieve a light shade. Once you’re done, rinse the garment in cool water, holding the lightest-colored portion closest to the stream of water (this will allow the dye to continue to flow down into the darker sections).
CANDLE-MAKING
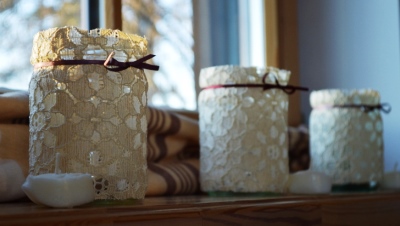 Candle-making is an easy project you can master in an afternoon—all you need are wax flakes, dye, wicks, and kebab skewers. Heat the wax flakes on a stove, adding drops of your desired color. Find a container (it can be anything from an old drinking glass to a teacup), and place the wick inside. (Use the skewers to keep the wick erect by taping two together, resting them on top of your container, and slipping the string in between them.) Next, pour the liquid wax into the container. Once it hardens, remove the skewers. For added flair, add a ribbon or paint the outside.
SEED BOMBS
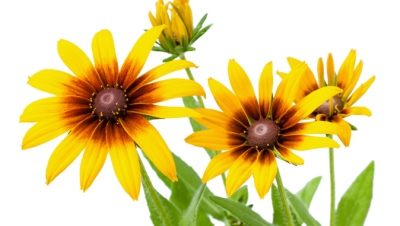 Seed bombs are a great way to add some beauty to a neighborhood—and help struggling bee populations. (As an added bonus, this project lets you play around in the dirt.) After figuring out what flowers will work best for the climate you live in, mix together seeds, potter’s clay, and peat-free compost. Gradually add water until the consistency is sticky enough to form balls. Let your bombs dry out in the sun (or on a sunny windowsill) for at least a few hours. Once they’re ready to go, find the right place to unleash them—just be sure to stay away from private property and other people’s gardens.
Want more crafty ideas? It’s nearly that time of year! Check out how to dye Easter eggs using natural ingredients.


Mary Gist says,
Wonderful ideas,ell do the candle,and a few others.
Chris Guma says,
Awesome,
D.M. Ezell says,
Great came in handy I’m starting vacation bible school in 2 weeks. Very useful projects.
Thanks much.
Margaret M. Freeman says,
Wow! I love these ideas you are sharing! Thanks so much!
Karen says,
Thank you so much… ☀?☀