
Looking to unleash your crafty side this winter? These inexpensive holiday projects require minimal time, money, or effort—just a little creativity. And best of all, they’re easy enough that even your youngest (or clumsiest) family members can join in on the fun.
1. A No-Sew Fleece Blanket
Not patient enough to teach the entire clan how to quilt? Start small, and have them help you make a simple, no-sew holiday blanket from fleece. Buy two pieces of fleece, two yards each (the more colorful and/or crazy, the better!), along with a pair of fabric scissors. Lay the fleece pieces together, wrong-sides touching, on a solid surface, and trim the ends until they’re roughly the same size. Then, use a ruler to measure and cut a 6-inch square from each corner of the fleece. You’re not done with the scissors quite yet: Use them to cut 6-inch slits at 1-inch intervals around all sides of both pieces of fabric. Then, knot the fringes together to make a cozy, double-layered coverlet.
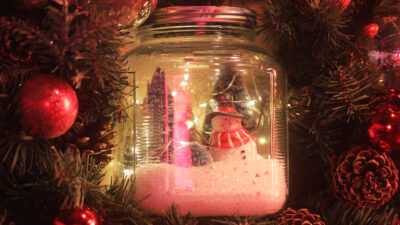
2. Mason Jar Wonderland
 Supplies
Large mason jar
Fairy string lights
Miniature snowman
Bottle brush trees
Artificial snow
Instructions
1. Open the mason jar and let your child add some artificial snow.
2. Then, add the bottle brush trees and the miniature snowman.
3. Lastly, your child can add the fairy lights — make sure to attach the battery pack to the
lid!
4. Close the top of the mason jar and display
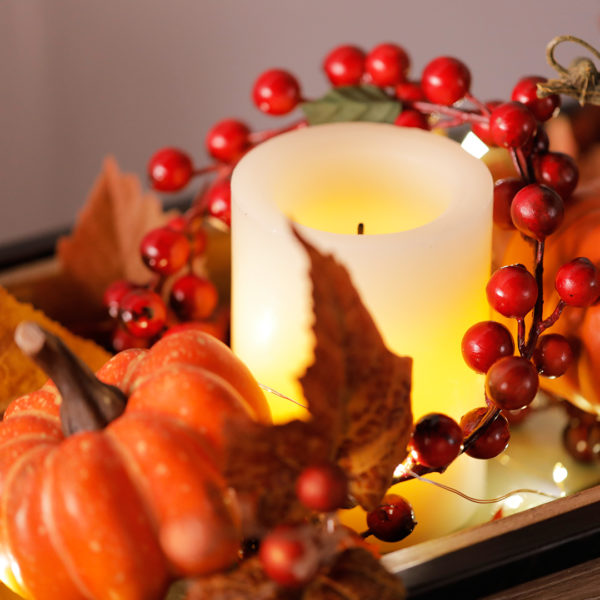
3. Pomander Balls
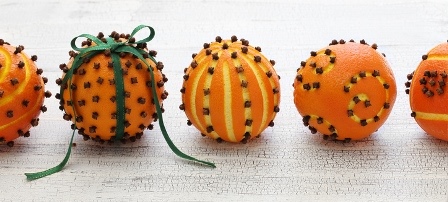 This Christmas craft is a throwback to Colonial times. Early America didn’t have Christmas trees that they decorated with tinsel and baubles. Instead, those that observed the holiday likely festooned their homes with greenery. They did, however make pomander balls—a spicy decoration that made the entire room smell good. To make your own, simply pierce a small piece of fruit—like an apple, a lemon or orange—with cloves until its surface is completely covered, and let it dry. Tie a ribbon around the finished product, and hang it from a mantel or tree.

4. An Unexpected Garland
This year, skip the evergreen branches, and fashion a garland using unexpected source materials. Using thread and a needle, string cranberries and popcorn together, or try hanging old light bulbs, pieces of bunched-up fabric, decorative paper, crocheted decorations, or dried fruits. The options are endless.
5. Gingerbread Mug Toppers
 If your culinary crew makes building an entire gingerbread house look as ambitious as constructing a full-sized house, skip the complicated pastry architecture and mold tiny houses, candy canes, or other shapes from the dough. Perch them (or hang them) from the rim of a mug of hot chocolate or cider, and once they’re soggy, eat the tiny treats.
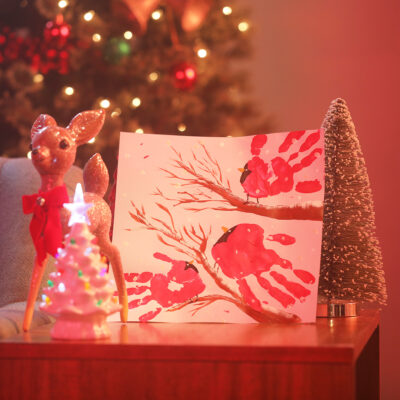
6. Handprint Bird Painting
 Supplies
Construction paper
Red or blue paint
Brown paint
Black paint
Orange paint
White paint
Paintbrushes
Instructions
1. Cover your child’s hand and one of your hands with blue or red paint and evenly place handprints across the paper.
2. You and your child can use the brown paint to paint the branches the birds will be on.
3. Next, use black paint to create a “mask” around the faces of the birds and their feet. Use
the orange paint to paint a beak on the thumb of the handprint.
4. Take the white paint and add snow to the branches as well as dots of falling snow.
5. You and your child can add a dot of white paint to each of the birds’ “masks” to create
eyes.
6. Enjoy your art!

7. Festive Wreaths
Expecting holiday guests? Welcome them with a festive, hand-designed door wreath. Most Christmas tree vendors sell plain wreaths made from evergreen, and if you’re looking for something a little less maintenance, craft stores typically sell faux ones. Glue on the requisite ornaments, tinsel, and bows, but don’t shy away from adding more creative details, too. (Think seashells from a beach vacation, tiny toys or figurines, or even wooden dreidels to make it Hanukkah-inspired.)
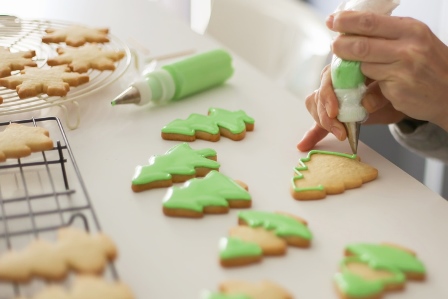
8. Decorated Cookies
Even the most reluctant crafter can’t complain if the end result is edible. Whip up a batch of sugar cookie dough—or simply roll out a tube of ready-made mix—and cut it into festive shapes using cookie cutters. (If you don’t have any on hand, you can make stencils from cardboard, parchment, or paper, and trim around them with a small knife or pizza cutter.) Once the cookies have cooled, decorate them with frosting (peanut butter or cream cheese works in a pinch) and sprinkles, chocolate chips, and other tasty toppings.
9. Cozy Scented Candles
You don’t need to be an aromatherapist to make cozy scented candles.
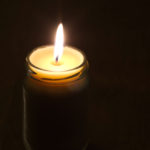 Simply take a clean glass container (a mason jar works well), and place a pre-waxed candlewick inside. Then, pour candle wax flakes inside a heatproof measuring cup, and place the wax-filled cup inside a medium-heated saucepan, half-filled with water. Stir the wax with a metal spoon until it’s fully melted. Take the cup off the stove, and add essential oil and bits of crayon wax to the mix for added color and scent. Pour the mixture inside the prepared glass jar, wait for it to harden, and voila—an instant light source.
10. Tealight Snowman Ornaments
Supplies
10 Tealights
Black permanent marker
Black construction paper
Thin red ribbon
Pipe cleaners
Thick red ribbon
Small multicolored pom-poms
Glue dots
Glue stick
Instructions
1. Cut five black snowman hats out of the black construction paper. Glue some thin red
ribbon to the hats between the rim and the top.
2. Using the permanent marker, your child can draw eyes and a dotted smile around the
light of the tealight to create a snowman face.
3. Using glue dots, you and your child can glue a hat onto the heads of five of the
snowmen.
4. Next, using glue dots, attach multicolored pom-poms to the sides of the heads of the five
other snowmen faces.
5. Then, glue pieces of pipe cleaner between the pom-poms to create an earmuff line on
the top of each snowman’s head.
6. You and your child can glue some thick ribbon “bow ties” and “scarves” to the bottom of
the snowmen’s heads.
7. Glue some thin ribbon to the back of each tealight at the top of the snowmen’s heads.
8. Hang up the tealights and turn them on so the noses of the snowmen can glow.
9. Enjoy!
11. Paper Snowflakes
 Not everyone is lucky enough to live in a winter wonderland. If your local climate is more suited for swimming than skiing, you can still make it snow inside by cutting paper snowflakes. Here’s a quick how-to: Fold a square piece of paper in half diagonally, forming a triangle. Then, fold the triangle in half again, making an even smaller one. Fold this triangle into thirds, and cut across the bottom of the paper, lopping off the pointed edges. Cut designs into the folded papers, unfold it, and you’re left with a lacy piece of paper that looks just like the precipitation you wish would fall outside.
Keep the holiday season bright for you and your family by making sure you’re covered by the right home insurance. Whether you rent or own, the GEICO Insurance Agency is here to help find an affordable policy that’s right for you. Click here to start a quote.


Cecilia says,
Thanks a lot for these practical Christmas crafts. They’re very useful and easy to make especially for the pre-occupied people.
Mary .feigley says,
Thank you f o r the craft ideas.
Elizabeth & James Smith says,
Excellent ideas for Christmas. Thanks, Merry Christmas for you all!🎄
Gladys says,
Great ideas. Used some of them when I was young.
Martha says,
Wow, I love 💗 all that ideas, thank you 😊
CAROL Daniels says,
Thank you for showing me THESE IDEA s! I LOVE THEM and plan to try several of them! KEEP UP THE GOOD WORK AND MERRY CHRISTMAS TO YOU ALL! CAN’T WAIT ON MORE!
AnnaThompson says,
I enjoyed all your crafts but the . Can you please send the Snowman in steps and or some kind pictures. I didn’t quite understand that one at all. Thank You to all of you that make our lives better. Merry Christmas and a Happy New Year!!
Tonya Maxwell says,
Yes 👍 L❤️VE IT ALL THANK Y❤️U SO MUCH
Martha says,
Fun ideas
Jenny says,
Thank you for the ideas, its really nice your insurance company is so close to you and your daily life. Happy Holidays!!!
Vasiliki Diakoumis says,
Thanks you have given me great ideas for Christmas 🎄 Merry Christmas 🎄🎁
Kathleen Batchelder says,
Thank you for the great ideas.
Lydia. E. Rivera. says,
I’m going to try the Pomander balls. they looks very nice.
Phyllis Copelin says,
Enjoyed the hints
sandy prouty says,
I would love to see a snowman tea light step by step, I just can not picture how you can make a snowman out of a tea light. please show. Thank you.
Tonya Maxwell says,
L❤️ E 2 SEE snowman I u could please send 2 me THANK Y❤️U SO MUCH
Colleen Easley says,
Am going to try all of these:
HAVE A VERY MERRY CHRISTMAS!!!
Pauline Nwaubani says,
Thanks a lot! Beautiful ideas for the this Christmas season.